
A few people have asked how we painted our cabinets, so I thought I'd just do a blog post about it. This literally could not have gone any better for us. I was fully expecting to have drips and clumps to deal with, and there was none of that. I don't know if it's because we went into it with no expectations? Whatever it was, they turned out great and it was 200% worth it to do it (and to not pay someone!)
Step 1: Remove all cabinet doors and pulls.
We took all the doors off the cabinets, and then removed the hinges from the doors as well. We made sure to have a container for all the hinges, a container for all the screws that held the hinges on the doors, and then left the screws that attached the hinges to the cabinets INSIDE the cabinets. That way we didn't lose any important parts!
This is also the part where you should remove all the hardware (pulls and knobs) from the cabinet doors and drawers. We didn't have any to begin with, so we didn't have to bother with that step.
Step 2: Tape tape tape!
Tape all your edges including where the cabinets meet the floors, walls and any appliances that aren't easily moved. Our dishwasher is stuck in there pretty tight, so we didn't bother trying to move it to paint. Instead, I taped it up.
Also, you might want to tape off the inside of the drawers (since it might not be worth it to take off the drawer fronts to you. It wasn't to us.)
Step 3: Don't bother sanding, just use Bonding Primer.
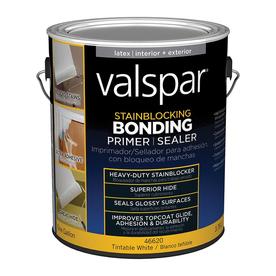
We were going to sand all the cabinets and doors and drawers, but then found this little gem. After reading the directions (which specifically said to not sand, but just make sure all surfaces were cleaned before use), I was sold! Once this went on, the cabinets actually felt like they had been sanded. I guess that's what it does? Also, part of our cabinets were made from laminate, so this was absolutely necessary in order to get the paint to stick to it! Worked like a charm.
We didn't even use half the can - this stuff is THICK, so if you buy it, you could easily get several projects out of it.

(After the bonding primer step. We didn't paint the island because we covered it in bead board first.)
Step 4: Paint all the doors and drawer fronts and cabinets (2-3 coats)
Here's my magic tip for all you cabinet painters out there: Don't glob on the paint. Avoid drips and clumps by doing 2-3 thin, even coats. You might need more depending on your cabinets and lighting, but LAY IT ON THIN. If you do happen to notice a drip or glob that has dried before you could catch it, just go over that spot with a high grit sandpaper and keep on painting.
You really can't mess this up!
The other tip is to use a good brush (don't buy the cheap ones for this project!) for the detail parts, and a small foam roller for the larger surface areas. The roller makes it go wayyyyy faster and leaves it smoother. They make specific rollers for cabinetry, so just check the paintbrush aisle. We used a 4" roller and an angled brush.
Step 5: Reattach all hinges and doors and hardware and enjoy!

The end.
Kitchen Renovation Source List:
- Main cabinet color: Valspar's Blizzard Fog/Satin
- Island color: Valspar's Green Peppercorn/Satin
- Drawer Pulls: Belwith Products P3463-VB Traditional Roma Pull
- Island Pendant Lights: Allen + Roth Oil Rubbed Bronze Mini-Pendant Light with Textured Shade (The glass looks green at this link, but they're actually a really pretty brown-ish color.)
- Barstools: Delta 24" Aluminum bar stools (MY FAVORITE THING EVER!!!!)
- Campbell's high chair: IKEA Antilop
I think that about covers our list...Any questions? Just ask, I can't very well read your minds.
11 comments:
Love it! It's so pretty, Sarah. Someday when I own a home I am going to hire someone to do all the amazing things that you post here. :)
I'm going to do it. You have inspired me. Well, at least to attempt the bathroom. :)
Do it Kristen! And please share photos when you're done!
Drying time between each coat of primer and paint? I just applied my first coat of the binding primer last night.
I think we waited about 2 hours between, but check the directions on the can you have because drying time may vary!
The can says 2-4. I have been waiting about 3. Thank you so much. Also, I purchased the same bonding primer. I bought valspars signature paint with paint and primer. I have just completed my second coat and stress has taken over. It does not have the smooth finish I was hoping for. And I feel like I can see strokes from the foam roller and my brush. I purchased good quality ones( I did not cheap out!) I am hoping you had this to, and with the final 3rd coat it all worked out!
It should even out with the 3rd, but you can also lightly sand between coats with a fine grit sandpaper (220 or higher). Good luck!
Does the Valspar Bonding primer really bond to kitchen cabinets well enough to not sand? We always spend a good hour and a few sanding pads to slightly rough up the surface. However we have never used the Valspar Bonding Primer before. The only primer that I use on painting cabinets without sanding is an alkyd primer. However that is a horrible option for an occupied home.
We are almost a year in and overall, the finish is in pretty good shape. There are definitely some places on the more frequently used cabinets (and even then, mostly on the corners) that need to be touched up. We haven't experienced any peeling anywhere! I'm sure sanding could've eliminated some of that, but overall I'm satisfied with bonding primer for the amount of time it saved us not sanding. Also, it worked great for prepping some of the laminate parts of our cabinets!
I know that this post is from last year but I was wondering what wall paint color you used??
Hi Jennifer! It is Valspar's Woodlawn Colonial Gray
Post a Comment