Hey Bandwagon, wait for meeeee!

Saturday, June 22, 2013
Wednesday, June 12, 2013
Upcycling TOMS + other random things that are consuming my life
It's summer time and that apparently equals BUSY over here! But unfortunately, that hasn't stopped me from downloading Dots and Candy Crush Saga onto my iPhone and wasting every free second bent over that thing/cursing like a sailor. Those games are HARD, but I can't quit now!

True story, while waiting for my pictures to upload to this blog post, I played 20 rounds of Candy Crush. I only stopped because I just lost all my lives. This is a problem.
I keep overhearing people (OK, I'm an eavesdropper. Secret's out.) saying "I can't believe it's mid-June already! And I totally agree with them. Where does the time go in the summer? You'd think since we have more daylight, the days would feel longer. No such luck!
I've been trying to have some sort of activity planned for me and C to do each day so we don't go crazy or sit inside staring out the windows like we did all winter. I mean, come on. I'm over that. How depressing. Hence, my lack of blogging/returning phone calls/cleaning. Me and my baby-buddy are busy, y'all!

Like, busy riding around on this tractor toy I dug out of the neighbor's trash.
This also means that when C is down for a nap, I am having down time. And down time = Candy Crush Saga this week.
BUT, before I got Candy Crush, I actually did a little upcycle to my black TOMS. They're one of the first pair I got, and they've had holes in the toes for a couple of years now. I stopped wearing them for a while when I was pregnant and my feet grew. And it's taken a while for them to get back to normal.
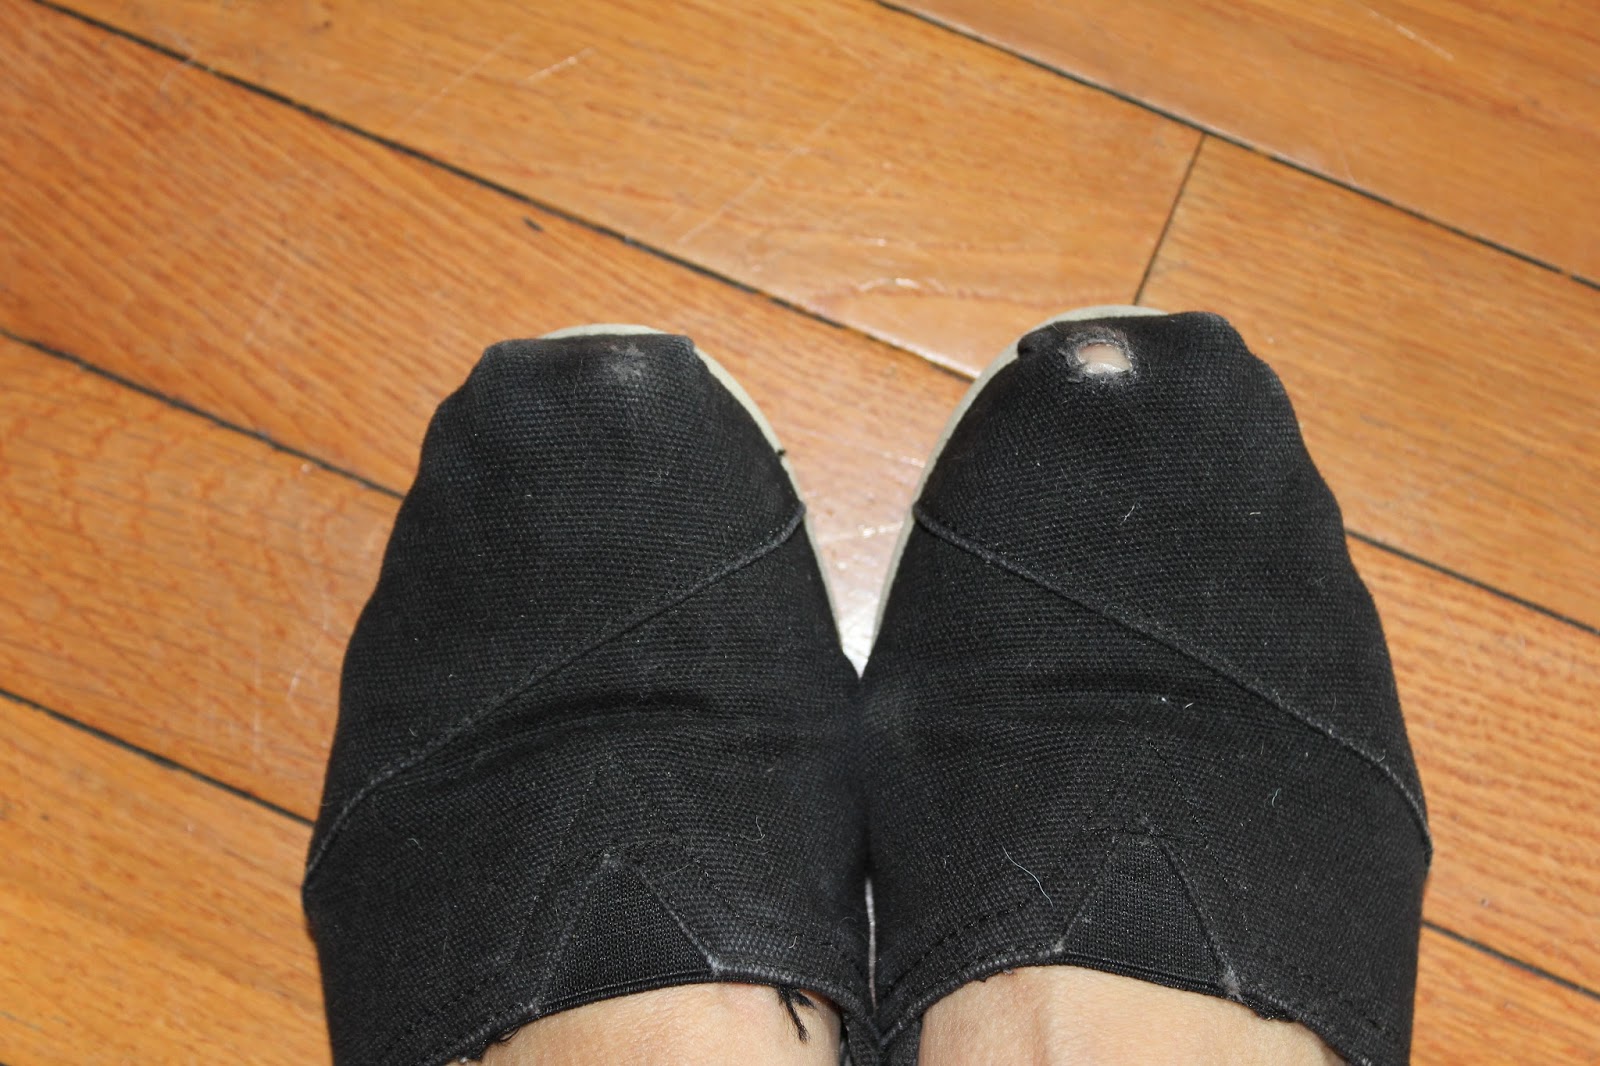
Ok. Honestly, they didn't go all the way back to normal. I think they're wider than before. So that makes these TOMS a liiiiiiittle snug, and the holes started to get more and more noticeable.
Then I remembered I had some fun black fabric in my stash with white stitching across it and thought it'd be PERFECT for my hole-y TOMS.

And also, I guess I drag my left foot behind me in some weird way, because there was this hole on the back heel only. So that needed to be spruced up as well.
The first thing I did was make the holes bigger by cutting them open. I did this because I thought it might help the shoes not feel so tight with an extra layer of fabric. (I've covered another pair of TOMS before and unfortunately, after they were covered, I couldn't fit my giant feet into them.)

Cut the toes open a little bit for more room. Cut more than this for more room, then stuff the toes to the brim while gluing the fabric down,
Also, I know I should have washed them before I did this, but I didn't. I wore them to the splash pad one day, so maybe that is good enough?
Basically, I just cut some fabric to size and glued it down, tucking it in as I went.
Then I did a bad job taking pictures along the way, but here are a few bullet points of tips to successfully up-cycling your TOMS:
- Choose a cotton fabric and make sure it is pre-washed before you glue it on. That way, if you want to wash your TOMS later, the fabric doesn't warp and peel off.
- Hem the fabric piece along one side for the toe piece and measure and hem 3 sides for the back heel patch (this helps it look more finished, and keeps the edges from fraying.)
- Stuff a bunch of toilet paper in the toes to help them keep shape while you're gluing the fabric down.
- Use masking tape or painters tape to hold the fabric in place for a few hours while it's drying. I mean, REALLY TAPE THOSE SUCKERS UP.
- For the back heel, cut a little piece from the middle to show the TOMS label, and slowly cut away more until you are showing the whole label. If you try to do this all at once, you will probably end up getting it crooked.
- After it is all glued down and dry, trim away the excess fabric with small, sharp scissors. Then, go back along the edges and add extra glue where needed, and tape it down again for a few more hours.
- Remove tape and wear!

ta-da!
The good news is, these fit this time! The bad news is, there is no bad news.
The other good news is, did anyone see this week's episode of Real Housewives of Orange County? How is it possible for me to love people who I've never met so much?
I bet anyone reading this blog post who doesn't really know me probably thinks I'm white trash.
Monday, June 3, 2013
Do you have a chalkboard wall? (How to dress it up!)
Title sung to the tune of 'Do You Know the Muffin Man?' Commence singing it in your head all day. You're welcome!
Today during nap time (Campbell's, not mine), I pried myself off the couch long enough to spruce up our chalkboard wall. Not that it needed sprucing up, but more is more in my humble opinion.
This little update was so freakin' easy, any child with lower-level scissor skills could do it. That's why I'm sharing it. For all the low-level scissor-smiths that read my blog.
DIY Contact Paper Frames

Shout out to my iPhone 4s. Thanks for taking such professional looking photos!
Materials: Scissors. Sharpie. Contact paper.

Step 1: Fold contact paper in half.
Step 2: Draw a doodly-dad in whatever shape you want your contact paper frame to be.

I call this shape "Bumps and Spikes."
Step 3: Draw the inner part of your frame. I used an oval on this one, and squares/rectangles in others.

Step 4: Cut. It. Out. (This step was brought to you by Uncle Joey.)


Step 5: Peel off the back of the contact paper and stick it up on the wall.

Ta-da!
I think it dresses it up a little/organizes the chalkboard chaos. For a while there, Kennedy was listing out new compliments to me every day. I finally had to say, "Enough, enough, I get it! You love me. Now can we just stick to one compliment at a time already?" I know. But don't feel sorry for me, he has other great qualities. :-)
My point is, now he has a designated area where he can tell me how great I am (See: bottom frame.) And I have a place/places for him, too! The bottom of the wall is still designated for C-buddy's scribbles, which, I don't think I can bring myself to ever erase. So I don't know how he plans on adding to his section.
Do you have contact paper? I have this huge-A roll of white contact paper that I got for lining drawers and shelves. I don't think I'll ever run out of it. But if I do, maybe I'll head on down to Home Depot or Lowe's and pick up some more in a funky color/pattern.
The great thing about this contact paper being stuck to your wall is that it peels of rather easily if you get sick of it, and it leaves absolutely no residue behind. How's that for non-committal decor?
Do you have a chalkboard wall?
A chalkboard wall?
A chalkboard wall.
Do you have a chalkboard wall?
Well let's go dress it up!
Subscribe to:
Posts (Atom)