I'M DONE.
Now to just sit and wait for the actual baby to get here! I might even have a little time left to make some DIY baby headbands or DIY baby onesies. Or sleep.
Anyway friends, here's this girl's nursery (unless she turns out to be a boy, in which case I'll have some tweaking to do.) I'll (mostly) let pictures speak for themselves. Also, expect to read some bragging on my part, since I DIY'd a lot of this nursery like an insane person.
I made the bedding myself. The skirt is an antique quilt top (unfinished quilt) that I got on Etsy. I took part of it apart and backed it with an old white sheet I already had. It's in 3 pieces (the front panel, and 2 shorter side panels.) I still have a ton leftover to use elsewhere.
I also made 2 crib sheets from clearance fabric at JoAnn. All together, the bedding cost well under $50.
OH YEAH, and I knitted that coral baby blanket AND made a new boppy cover.
(For the record, I'm bragging because I put a lot of work into the nursery, not because I think it's better than any other nursery.)
Here's an iphone pic of the crib with the other sheet I made, in case you were wondering what it looked like!
Here's a little hanging rack that Kennedy and I made. It's just a piece of antique stamped tin that we hammered around a 1x4, then screwed some mismatched knobs into it. The tin came from Kennedy's mom, the knobs came from Hobby Lobby.
I painted this antique dresser with Annie Sloan's chalk paint and replaced the knobs with some glass pulls from Hobby Lobby.
I sewed the changing table cover (easiest sewing project of the entire nursery!)
Above the table is an old trough that was previously attached to an antique window frame I've had forever. It stuck out pretty far from the wall when it was attached to the window, so didn't fit in a lot of places. I finally figured out I could just unscrew them from each other and this became the perfect thing to hang in the big blank space above the changing table.
I painted the flowers inside so it would have the look of a flower box. Probably going to use the inside of that shelf to keep certain things out of reach of C (diaper creams, etc.)
Also, I attached a bunch of hooks to the underside so now I have a place to keep baby headbands!
I brought C's little yellow rocker in here so he would have a place to sit if he wanted. So far, he likes to come in here and move the chair to different spots in the room. Fine by me! Hopefully he'll be this good at entertaining himself for a bit when the baby comes.
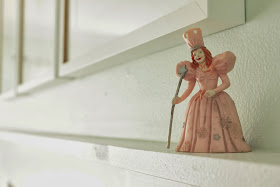
My old Glenda the Good Witch figurine is perched over the crib.
Hope you enjoyed the tour! Leave a comment if you have any questions!


Beautiful! Baby Girl Dean has a Momma loves her soo much, even before she arrives. - Nora C.
ReplyDeleteSara, this a beautiful room to welcome your new baby girl. You are so creative! You should feel very proud.
ReplyDeleteThis is amazing, and you should be bragging! That's a lot of work, especially with a toddler to chase after as well.
ReplyDeleteBarbara and I love what you have done in this space!
ReplyDeleteWe like your low-cost, clever, and cute approach in creating the nursery. Thank you for sharing it with us.
The colors are gorgeous! You are very talented.
ReplyDeletehands down one of the cutest nurserys i've ever seen!! it's precious and i love the colors!
ReplyDelete